
Welcome, fellow Kubernetes enthusiast! Buckle up, because we’re about to dive into the magical world of Kubernetes, where containers frolic and nodes communicate in perfect harmony.
This guide will take you through deploying Kubernetes 1.30 and upgrading it to 1.31 using Kubeadm and Cilium as our trusty CNI (Container Network Interface) and replacement of kube-proxy.
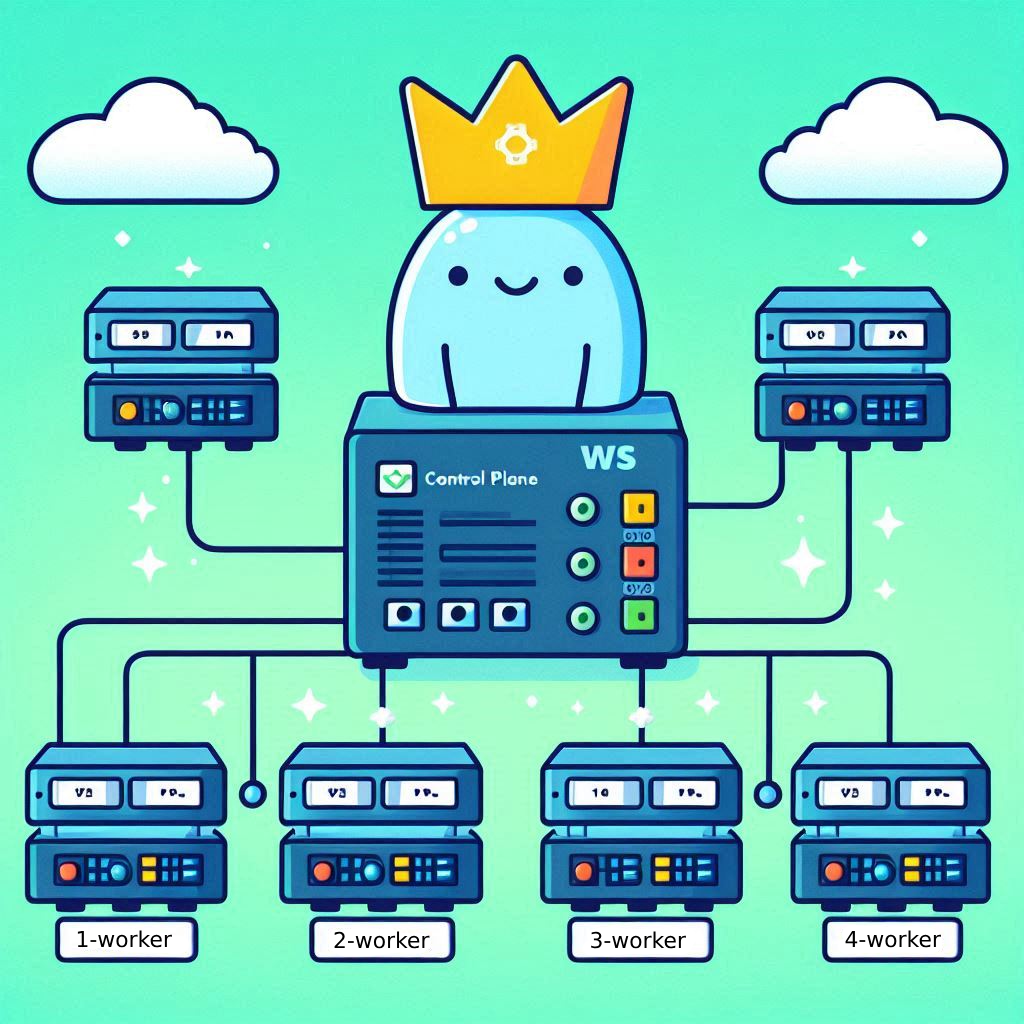
For this first simple tutorial, we will use 1 controlplane node and 1 worker node.
VM Naming and Configuration
Before we embark on this adventure, let’s name our virtual machines (VMs) like a pro. No, “Server123” doesn’t cut it!
-
Control Plane VM
- Hostname:
1-controlplane - Fully Qualified Domain Name (FQDN):
{\d+}-controlplane.k8s - OS: Ubuntu/Debian
- Resources: 2 CPU, 2048MB Memory
- Hostname:
-
Worker VM
- Hostname:
1-worker - Fully Qualified Domain Name (FQDN):
{\d+}-worker.k8s - OS: Ubuntu/Debian
- Resources: 1 CPU, 1024MB Memory
- Hostname:
-
Networking
-
Internet facing network
Type: Bridge
Name: default
Domain: default
Forwarding: NAT
Network: 192.168.100.0/24
DHCP range: 192.168.100.2 - 192.168.100.254 -
K8s Internal Network
Type: Isolated
Name: k8s
Domain: k8s
Forwarding: Isolated network
Network: 192.168.5.0/24
DHCP range: 192.168.5.2 - 192.168.5.254
-
Add the IP addresses from the default network to your /etc/hosts file so your local machine knows who’s who:
# Local K8s VMs
192.168.100.223 1-worker.k8s
192.168.100.49 1-controlplane.k8s
Feeling lost with IPs? Run hostname -I on each VM and become a wizard of IP discovery.
zar@1-controlplane:~$ hostname -I
#               IPv4 k8s
192.168.100.49  192.168.5.9
# IPv4 default
Prerequisites on the Nodes
-
Update the System
Let’s bring your system up to speed.
sudo apt-get update && sudo apt-get dist-upgrade -y # Make sure all updates are applied sudo reboot -
Become Root
It’s time to put on your Kubernetes Admin hat with this spell:
sudo -i -
Allow IP Forwarding
It’s time to teach your VM how to forward IP packets like a pro:
cat <<EOF | tee /etc/sysctl.d/kubernetes.conf
net.ipv4.ip_forward = 1
EOF

sysctl --system
For the curious among us, check out the Kubernetes documentation on IP forwarding.
-
Turn Off Swap
Kubelet’s by default a bit picky and doesn’t like swap. Let’s send swap to bed without supper:
sed -i '/swap/ s/^/#/' /etc/fstab
swapoff -a
We could create a swap-enabled Cluster by enabling the
NodeSwapfeature gate as described in the Kubernetes blog.Prior to version 1.22, Kubernetes did not provide support for swap memory on Linux systems. This was due to the inherent difficulty in guaranteeing and accounting for pod memory utilization when swap memory was involved. As a result, swap support was deemed out of scope in the initial design of Kubernetes, and the default behavior of a kubelet was to fail to start if swap memory was detected on a node.
Containerd Installation
Time to get containerd up and running! This is the engine that makes containers go vroom!
-
Set Up Repository
install -m 0755 -d /etc/apt/keyrings curl -fsSL https://download.docker.com/linux/ubuntu/gpg -o /etc/apt/keyrings/docker.asc chmod a+r /etc/apt/keyrings/docker.asc echo \ "deb [arch=$(dpkg --print-architecture) signed-by=/etc/apt/keyrings/docker.asc] https://download.docker.com/linux/ubuntu \ $(. /etc/os-release && echo "$VERSION_CODENAME") stable" | \ tee /etc/apt/sources.list.d/docker.list > /dev/null -
Install Containerd
Get your gear in place with:
apt-get update apt-get install -y containerd.io -
Configure Containerd
Let’s tweak some settings to keep containerd happy and healthy:
mkdir -p /etc/containerd
containerd config default | tee /etc/containerd/config.toml
sed -e 's/SystemdCgroup = false/SystemdCgroup = true/g' -i /etc/containerd/config.toml
systemctl restart containerd
systemctl enable containerd
As described in the Kubernetes docs.
-
Load Kernel Modules
As
br_netfilterpreflight checks where removed in kubeadm PR #123464, there is no need to add it as a kernel module anymore.Similarly
overlayis also not needed anymore since Kubernetes v1.31.Compare them here:
Installing Kubernetes
Let’s summon Kubernetes 1.30 into existence with a sprinkle of apt magic. This allows us to also update it to 1.31 later on.
-
Add Kubernetes Repositories
Add some Kubernetes spices to our OS:
# Install K8s Repository KUBERNETES_MAJOR_VERSION=1.30 curl -fsSL https://pkgs.k8s.io/core:/stable:/v${KUBERNETES_MAJOR_VERSION}/deb/Release.key | gpg --dearmor -o /etc/apt/keyrings/kubernetes-apt-keyring.gpg echo "deb [signed-by=/etc/apt/keyrings/kubernetes-apt-keyring.gpg] https://pkgs.k8s.io/core:/stable:/v${KUBERNETES_MAJOR_VERSION}/deb/ /" | tee /etc/apt/sources.list.d/kubernetes.list apt-get update -
Install Initial Kubernetes Version
Check out the available versions like you’re picking a dessert:
apt-cache madison kubeletChoose your flavor (let’s choose the latest available
1.30.4-1.1so we can do an upgrade later):KUBE_APT_VERSION=1.30.4-1.1 apt-get install -y kubelet=$KUBE_APT_VERSION kubeadm=$KUBE_APT_VERSION kubectl=$KUBE_APT_VERSION apt-mark hold kubelet kubeadm kubectl # Install additional tooling apt-get install -y cri-tools etcd-client -
Configure CRI Tools (optional)
Configure CRI tools to communicate with containerd:
crictl config \
--set runtime-endpoint=unix:///run/containerd/containerd.sock \
--set image-endpoint=unix:///run/containerd/containerd.sock
We can optionally test that
containerdactually works:crictl pull alpineShould output someting similar to this:
Image is up to date for sha256:324bc02ae1231fd9255658c128086395d3fa0aedd5a41ab6b034fd649d1a9260 -
Enable Kubelet
Get Kubelet up and running and make sure it’s doing well:
systemctl enable --now kubelet
systemctl status kubelet
Ignore errors like
error: open /var/lib/kubelet/config.yaml: no such file or directoryas that file will be created bykubeadm initin the next step or by thekubeadm joincommand on the worker nodes later on.# If kubelet has issues starting up, we can check the log here: journalctl -u kubelet -f
All steps above are also to be run on the worker nodes - from here on out, we get into Controlplane Domain!
-
Initialize Kubernetes Cluster
Here comes the fun part—starting your very own Kubernetes cluster:
KUBERNETES_VERSION=1.30.4
API_SERVER_IP=$(hostname -I | awk '{print $2}')
API_SERVER_IP_NAT=$(hostname -I | awk '{print $1}')

# Make sure the IP addresses are as expected
echo $API_SERVER_IP
echo $API_SERVER_IP_NAT
cat <<EOF | tee /tmp/kubeadm-config.yaml --- apiVersion: kubeadm.k8s.io/v1beta3 kind: ClusterConfiguration networking: podSubnet: 172.16.0.0/16 serviceSubnet: 172.31.0.0/16 kubernetesVersion: "v$KUBERNETES_VERSION" controlPlaneEndpoint: 1-controlplane.k8s apiServer: certSANs: - "$API_SERVER_IP" - "$API_SERVER_IP_NAT" - "1-controlplane" - "1-controlplane.k8s" --- apiVersion: kubeadm.k8s.io/v1beta3 kind: InitConfiguration localAPIEndpoint: advertiseAddress: $API_SERVER_IP bindPort: 6443 nodeRegistration: criSocket: "unix:///run/containerd/containerd.sock" kubeletExtraArgs: node-ip: $API_SERVER_IP skipPhases: - addon/kube-proxy EOFWe are skipping the creation of
kube-proxywith this, to useCiliumin its stead:skipPhases: - addon/kube-proxykubeadm init --config /tmp/kubeadm-config.yamlKeep that
kubeadm joincommand handy for when you add more nodes to your club.The mentioned pod network cidr and service cidr can be adjusted to your needs. They are internal addresses used by Kubernetes.
-
Export KUBECONFIG
As shown by
kubeadm# To start using your cluster, you need to run the following as a regular user: mkdir -p $HOME/.kube sudo cp -i /etc/kubernetes/admin.conf $HOME/.kube/config sudo chown $(id -u):$(id -g) $HOME/.kube/config # Alternatively, if you are the root user, you can run: export KUBECONFIG=/etc/kubernetes/admin.conf
Installing Cilium (CNI)
Networking is the lifeblood of Kubernetes, and Cilium is here to make sure our containers gossip seamlessly.

-
Install Helm
Get Helm, the package manager that makes Kubernetes sing:
Follow the Helm installation guide to set it up.
The current commands are:
curl https://baltocdn.com/helm/signing.asc | gpg --dearmor | sudo tee /usr/share/keyrings/helm.gpg > /dev/null sudo apt-get install apt-transport-https --yes echo "deb [arch=$(dpkg --print-architecture) signed-by=/usr/share/keyrings/helm.gpg] https://baltocdn.com/helm/stable/debian/ all main" | sudo tee /etc/apt/sources.list.d/helm-stable-debian.list sudo apt-get update sudo apt-get install helm -
Add Cilium Helm Repository
Add Cilium to Helm so we can unleash its power:
helm repo add cilium https://helm.cilium.io/
helm repo update cilium
Check the repository to see the latest chart version:
helm search repo cilium # NAME CHART VERSION APP VERSION DESCRIPTION # cilium/cilium 1.16.1 1.16.1 eBPF-based Networking, Security, and Observability # cilium/tetragon 1.1.2 1.1.2 Helm chart for Tetragon -
Install Cilium
Time to install Cilium and sprinkle some networking magic:
Retrieve the API server IP of the control plane directly from Kubernetes:
API_SERVER_IP=$(kubectl get nodes 1-controlplane -o jsonpath='{.status.addresses[*].address}' | awk '{print $1}')

echo ${API_SERVER_IP}
Install Cilium using Helm:
API_SERVER_PORT=6443 CILIUM_VERSION=1.16.1 helm upgrade --install cilium cilium/cilium \ --version ${CILIUM_VERSION} \ --namespace kube-system \ --set kubeProxyReplacement=true \ --set k8sServiceHost="${API_SERVER_IP}" \ --set k8sServicePort=${API_SERVER_PORT} -
Verify Cilium Installation
Watch as Cilium comes to life:
kubectl get pods -A -wNAMESPACE NAME READY STATUS RESTARTS AGE kube-system cilium-envoy-tjvt4 1/1 Running 0 109s kube-system cilium-g22gr 1/1 Running 0 109s kube-system cilium-operator-9cd776499-mpmt8 1/1 Running 0 109s kube-system cilium-operator-9cd776499-pb895 0/1 Pending 0 109s kube-system coredns-7db6d8ff4d-djhdz 1/1 Running 0 9m18s kube-system coredns-7db6d8ff4d-xnndj 1/1 Running 0 9m18s kube-system etcd-1-controlplane 1/1 Running 0 9m33s kube-system kube-apiserver-1-controlplane 1/1 Running 0 9m33s kube-system kube-controller-manager-1-controlplane 1/1 Running 0 9m33s kube-system kube-scheduler-1-controlplane 1/1 Running 0 9m33sThe
cilium-operatorwill only deploy one pod per node, so don’t panic if it shows1/2pods running initially (as we only have 1 node in the cluster for now).
Adding Worker Nodes
Invite more worker nodes to your Kubernetes party:
On each worker node, run the kubeadm join command from the Kubernetes initialization step:
# on 1-worker.k8s
kubeadm join 1-controlplane.k8s:6443 --token j0zksp.YYYYYYY \
   --discovery-token-ca-cert-hash sha256:XXXX
If you forgot to copy it, here is how to create a new one:
# on 1-controlplane.k8s
kubeadm token create --print-join-command
Make sure that follow all steps up until and including 4. Enable Kubelet on each worker node before proceeding.
Use the printed join command in your workers.
After a little wait, we see (from 1-controlplane.k8s) our node has joined and is Ready:
root@1-controlplane:~# kubectl get nodes
NAME             STATUS   ROLES           AGE   VERSION
1-controlplane   Ready    control-plane   14m   v1.30.4
1-worker         Ready    <none>          69s   v1.30.4
Upgrading Kubernetes
Let’s keep things fresh by upgrading our Kubernetes cluster.

-
Upgrade Kubernetes Components
Add the latest Kubernetes Repository:
# Install K8s Repository
KUBERNETES_MAJOR_VERSION=1.31

curl -fsSL https://pkgs.k8s.io/core:/stable:/v${KUBERNETES_MAJOR_VERSION}/deb/Release.key | gpg --dearmor -o /etc/apt/keyrings/kubernetes-apt-keyring.gpg

echo "deb [signed-by=/etc/apt/keyrings/kubernetes-apt-keyring.gpg] https://pkgs.k8s.io/core:/stable:/v${KUBERNETES_MAJOR_VERSION}/deb/ /" | tee /etc/apt/sources.list.d/kubernetes.list

apt-get update
First we want to only upgrade
kubeadmto keep the unscheduleable time of our nodes as short as possible:apt-mark unhold kubeadm apt-cache madison kubeadmAdd some new Kubernetes spices to our OS:
Set
KUBE_APT_VERSIONto the latest version you see!KUBE_APT_VERSION=1.31.0-1.1 apt-get install -y kubeadm=$KUBE_APT_VERSION apt-mark hold kubeadm -
Upgrade the Kubernetes Cluster
Apply the upgrade with your newfound skills:
KUBE_VERSION=1.31.0

kubeadm upgrade apply v$KUBE_VERSION
This might take a few minutes.
The upgrade command should print a success message:
[upgrade/successful] SUCCESS! Your cluster was upgraded to "v1.31.0". Enjoy! [upgrade/kubelet] Now that your control plane is upgraded, please proceed with upgrading your kubelets if you haven't already done so. -
Drain Control Plane Node
Ensure a smooth upgrade by draining the control plane node:
# On the controlplane node kubectl drain 1-controlplane --ignore-daemonsets -
Upgrade kubelet & kubectl
apt-mark unhold kubectl kubeletKUBE_APT_VERSIONshould already be correctly set from our update ofkubeadm.KUBE_APT_VERSION=1.31.0-1.1 apt-get install -y kubelet=$KUBE_APT_VERSION kubectl=$KUBE_APT_VERSION apt-mark hold kubectl kubelet -
Uncordon Control Plane Node
The node is upgraded:
kubectl get nodes

# NAME             STATUS                     ROLES           AGE     VERSION
# 1-controlplane   Ready,SchedulingDisabled   control-plane   19m     v1.31.0
# 1-worker         Ready                      <none>          6m35s   v1.30.4
If this is not the case yet, just restart kubelet:
systemctl daemon-reload
systemctl restart kubelet
Let your control plane node back in the game:
kubectl uncordon 1-controlplaneCheck again:
kubectl get nodes # NAME STATUS ROLES AGE VERSION # 1-controlplane Ready control-plane 20m v1.31.0 # 1-worker Ready <none> 7m17s v1.30.4 -
Upgrade Worker Node Kubernetes Components
sshinto1-worker.k8sfor the next steps and repeat the exact same steps as done with the controlplane node (steps 1 - 5).The only difference here is in the
kubeadmcommand (step 2) we call:# On controlplane nodes: kubeadm upgrade apply v$KUBE_VERSION # On worker nodes: kubeadm upgrade nodeRestart kubelet:
systemctl daemon-reload
systemctl restart kubelet
Looks good now:
root@1-controlplane:~# kubectl get nodes
NAME             STATUS   ROLES           AGE     VERSION
1-controlplane   Ready    control-plane   22m     v1.31.0
1-worker         Ready    <none>          8m58s   v1.31.0
Create a User
Let’s make your Kubernetes environment accessible with a new user and permissions.
-
Create New User
Welcome a new user to the club:
# On the controlplane node kubeadm kubeconfig user --client-name=zar > /tmp/zar.yaml -
Create Admin ClusterRole
The default
adminclusterrole does not provide full access to the cluster (example: you can’t managenodeswith it).Create a cluster role that gives you the largest keys to the Kubernetes kingdom:
# On the controlplane node kubectl create clusterrole full-admin --verb=* --resource=* -
Create ClusterRolebinding
Provide the keys to our kingdom to the newly created user:
# On the controlplane node kubectl create clusterrolebinding zar-full-admin --clusterrole=full-admin --user=zar -
Copy kubeconfig to local machine
We did all the stuff above, to actually get access to Kubernetes from our local machine - away from those pesky VMs:
# On host machine
scp 1-controlplane.k8s:/tmp/zar.yaml ~/.kube/config.yaml
sudo chmod 600 ~/.kube/config.yaml

# You might need to adjust the `server` variable so it uses the FQDN
# server: https://192.168.100.49:6443       // not super clean
# server: https://1-controlplane.k8s:6443   // better
Test that it works:
❯ kubectl get nodes
NAME             STATUS   ROLES           AGE   VERSION
1-controlplane   Ready    control-plane   33m   v1.31.0
1-worker         Ready    <none>          20m   v1.31.0
And there you have it — a fully functioning Kubernetes cluster!